
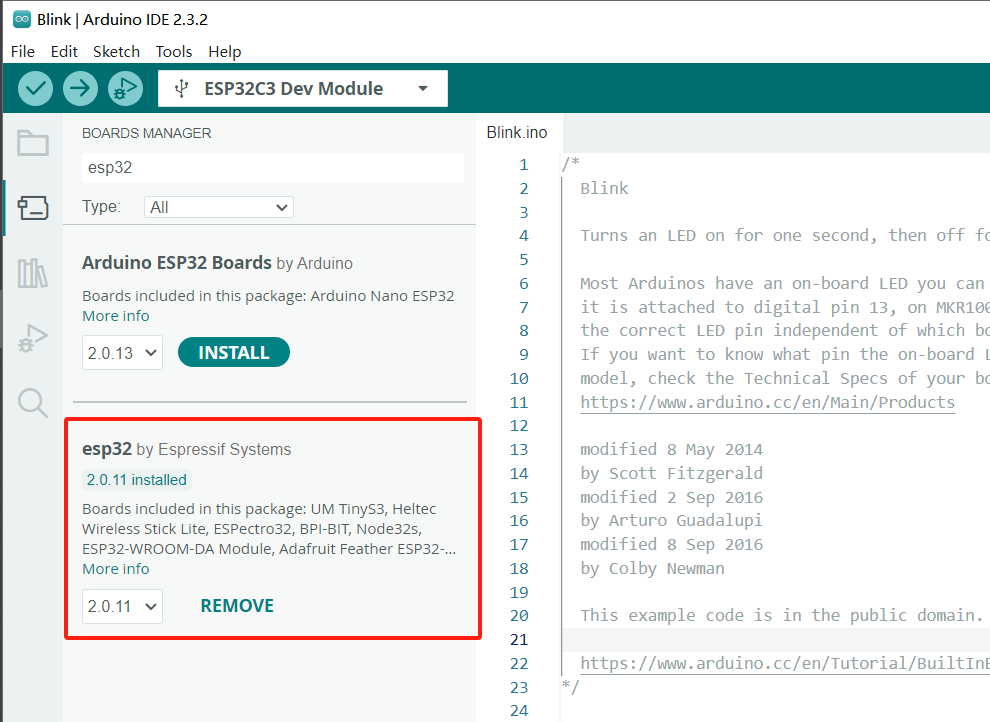
首先,你需要会上网,下载ESP32开发板支持包

这个需要改,否则能下载,但程序不运行。
这个需要改,否则能下载,但程序不运行。

#define LED_BUILTIN (13)

// the setup function runs once when you press reset or power the board
void setup() {
  // initialize digital pin LED_BUILTIN as an output.
  pinMode(LED_BUILTIN, OUTPUT);
}

// the loop function runs over and over again forever
void loop() {
  digitalWrite(LED_BUILTIN, HIGH);  // turn the LED on (HIGH is the voltage level)
  delay(1000);                      // wait for a second
  digitalWrite(LED_BUILTIN, LOW);   // turn the LED off by making the voltage LOW
  delay(1000);                      // wait for a second
}
点灯代码,灯是13号引脚
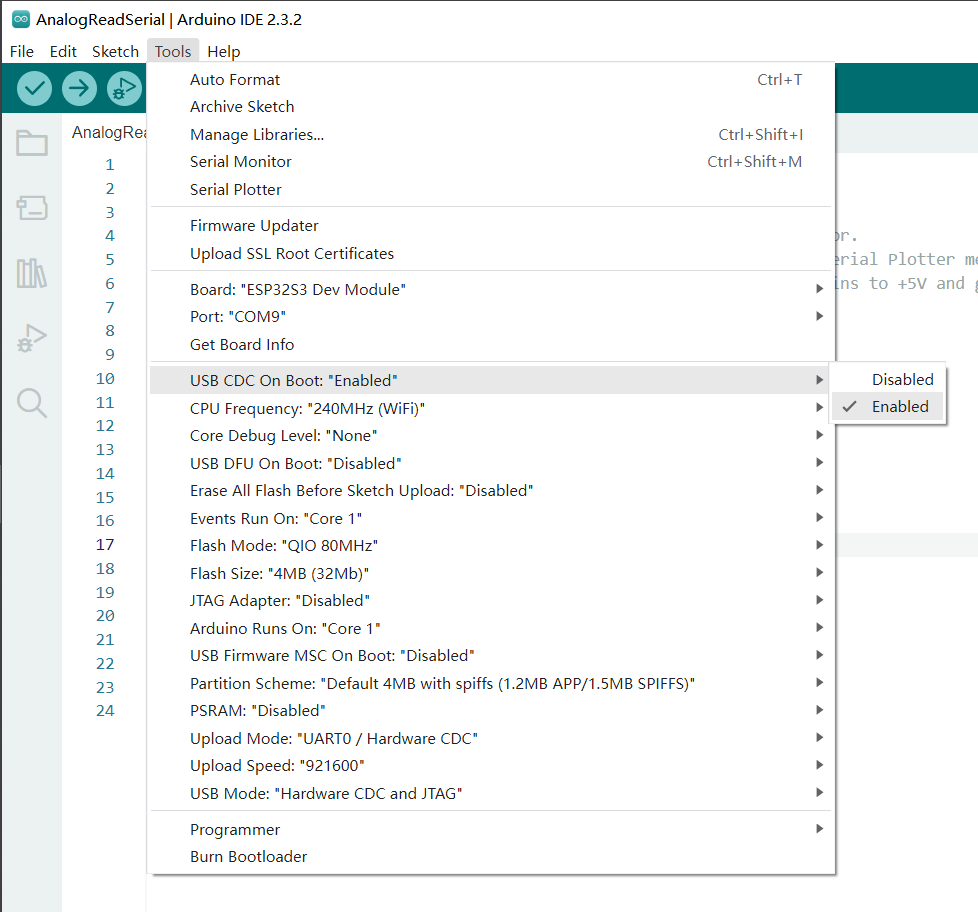
若使用CDC虚拟串口,需Enable
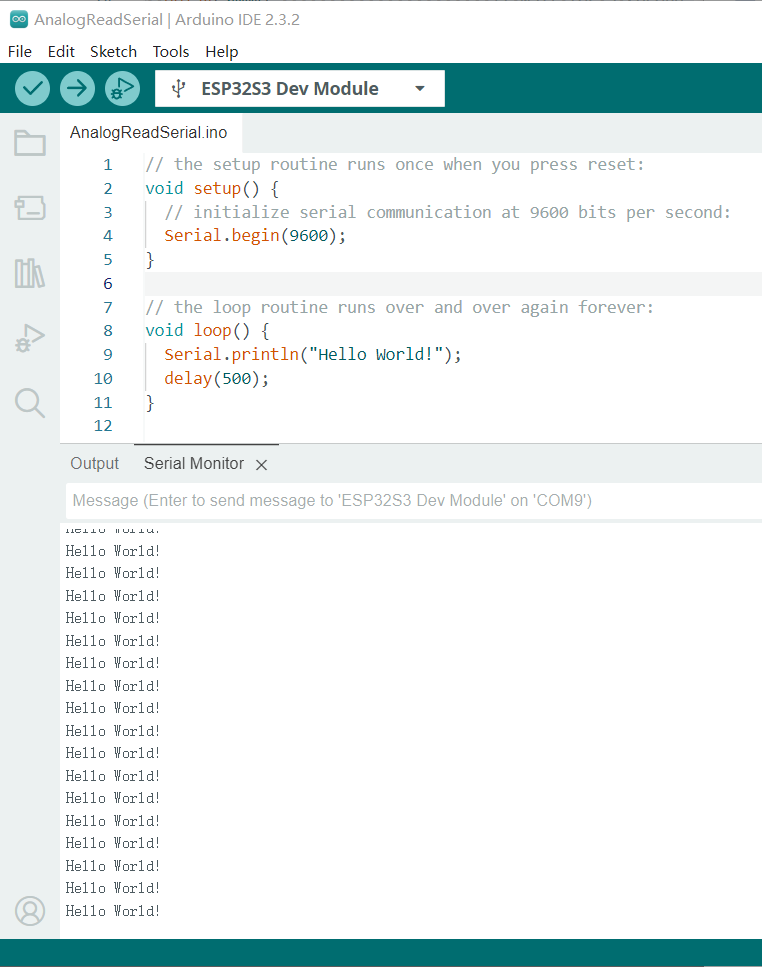
使用代码测试串口
// the setup routine runs once when you press reset:
void setup() {
  // initialize serial communication at 9600 bits per second:
  Serial.begin(9600);
}

// the loop routine runs over and over again forever:
void loop() {
  Serial.println("Hello World!");
  delay(500);
}
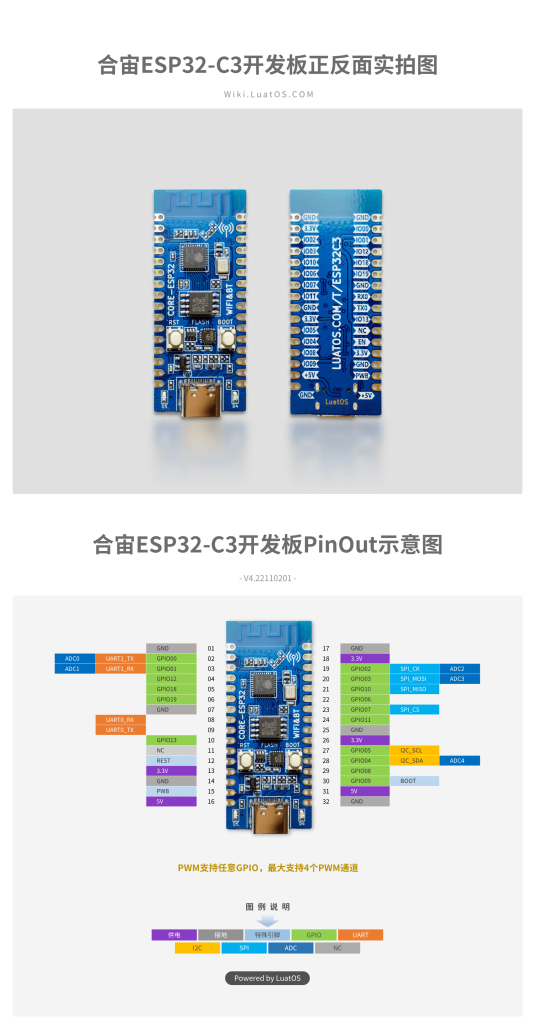
附上引脚图,愉快地开发吧!
#define LED_BUILTIN 8
int i = 0;

// the setup routine runs once when you press reset:
void setup() {
  // initialize serial communication at 9600 bits per second:
  Serial.begin(9600);
  pinMode(LED_BUILTIN, OUTPUT);

}

// the loop routine runs over and over again forever:
void loop() {
  digitalWrite(LED_BUILTIN, HIGH);  // turn the LED on (HIGH is the voltage level)
  Serial.print("Line");
  Serial.print(i++);
  Serial.println(": Hello World!");
  delay(8);
  digitalWrite(LED_BUILTIN, LOW);   // turn the LED off by making the voltage LOW
  delay(390);
}
附上一段炫酷的代码!(串口发送新消息时,LED快闪)